27 September, 2012

Crocheted spring bunny

My crochet obsession continues - though at the moment I'm working on next month's homework for the Monday Modern quilt group. One of my ambitions when I started crochet was to be able to make amigurumi. Everyone assured me that they were actually quite easy, so I got a book out from the library called Amigurumi for Dummies and tried to make a hamster. I tried starting about 8 times and none of them worked. Either the stitches got so tight as I went around that I literally couldn't get the hook into them, or the yarn fuzzed up so much I couldn't see what I was doing. Talk about demoralising - I couldn't even master a pattern from a book for dummies! Then I saw the start of Helen's little Spring Bunny and was so impressed with how she was going on her first attempt I thought it might be a good pattern to start with. Plus I've had it Pinned for quite awhile now, and it's always good to make things from Pinterest occasionally just to legitimise all the time I spend on there (though not so much these days I have to say). And I can report that yes it's a great beginner pattern and I have succeeded and I feel inordinately proud of myself! I haven't put the felt on the feet yet, but I'm half-inclined not to, I'll see what Hazel thinks.

Spring bunny

I think the success is down to the pattern and the wool/hook combination. Helen was using a slightly felted 8ply by Harmony, and my bunny is done in a similar, though slightly thicker 8ply called Aspire by Naturally. It's 70% wool and 30% alpaca and gorgeously soft. I used a 3.5 hook. The first few rounds of the head were a bit dodgy as I was trying to figure out how to use a row marker, but once I got that down it went pretty well. The only problem I had was the fact that if I get even slightly distracted I can't remember if I'm on the SC or the SC2tog and have to pull out a few stitches to figure it out (or a whole row!). I also mastered the invisible decrease which isn't nearly as hard as it looks in the diagrams. Always nice when that happens :) Now I can try a few larger items. Mat and Hazel have already put in orders but I'll see what takes my fancy I think!

21 September, 2012

The lazy woman's guide to making wonky stars

I like efficiency. I like finding a better, quicker, easier way to do anything. And really all that boils down to the fact that I'm, at heart, a very lazy person. If I can expend less energy getting from A to B then I'm all for it. So when I read instructions for wonky stars that want me to cut out lots of squares from various fabrics for the star points then my immediate thought is "do I really have to?". And no, it's not necessary, any old scrap will do if it's big enough as many other tutorials will tell you. But then I had issues with sewing on scraps and they wouldn't fit because I'd estimated wrong - unpicking the seam is time I could spend playing on the internet or with my iPhone, so that was just unacceptable. I also didn't like the wastage involved with some methods I've seen online. Fabric is expensive here in NZ, I'm not throwing away more than I need to. Lazy and cheap - that's me! So I started doing it this way. I'm sure I'm not the only person who does it this way, nor the first to document it, but I thought if it helped just one person spend more time on Instagram I would be doing the world a favour. This isn't a proper tutorial on doing a wonky star, just on making the sections. If you'd like to try making one I really like this tutorial at Oh Fransson!, although you have to add in the extra corner squares if you aren't joining them all together like she does.

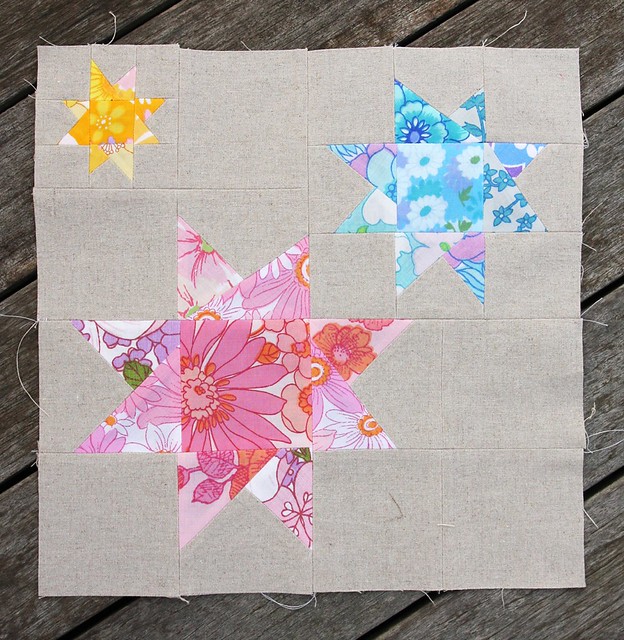
The thing I like about doing it this way is that it doesn't matter if you have a small scrap or a large one, and if it's large you can just work in from the edge as you make stars and you don't waste as much as you would if you precut bits. Admittedly, I wasn't quite as careful with the first fabric in this tutorial as I would normally be, but hopefully you get the picture!

Untitled


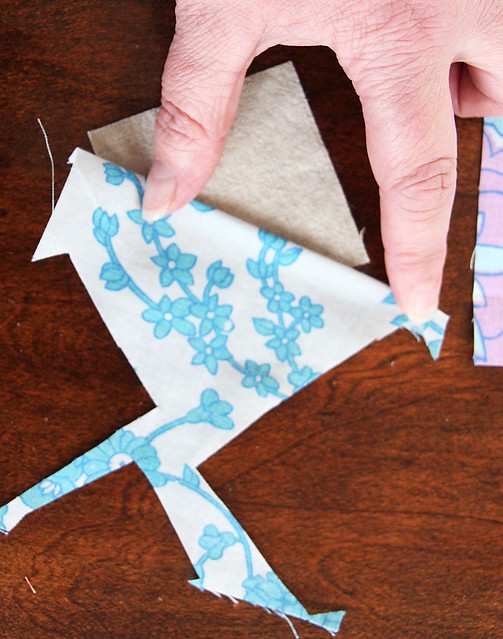
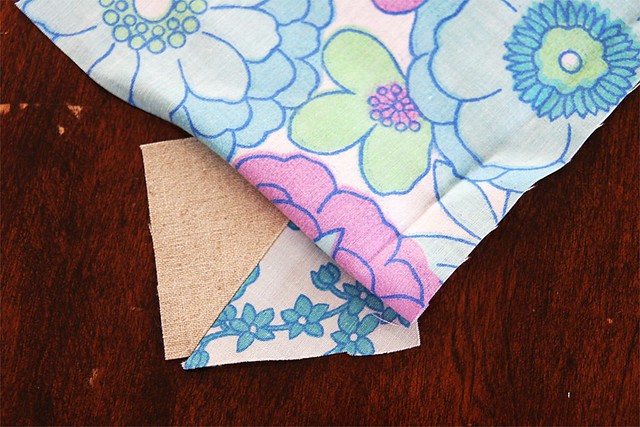
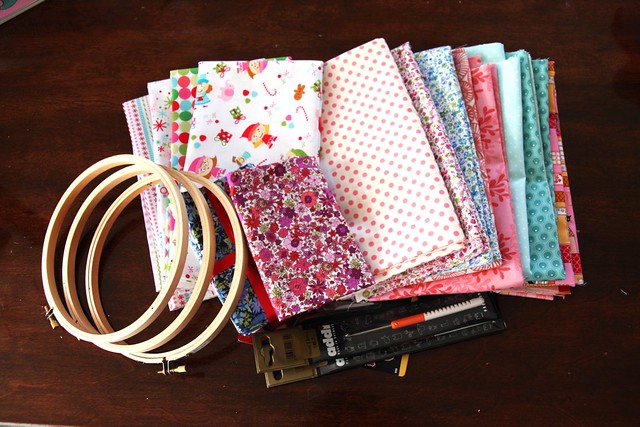
Select your first piece of fabric and fold over the edge about 1/4". It doesn't have to be exact but it does need to be even (please excuse the out-of-focus photos, the camera decided to focus on my wrinkly old hands instead). I finger crease it slightly.

Untitled


Then flip it over and figure out where you want it on your square.

IMG_0919
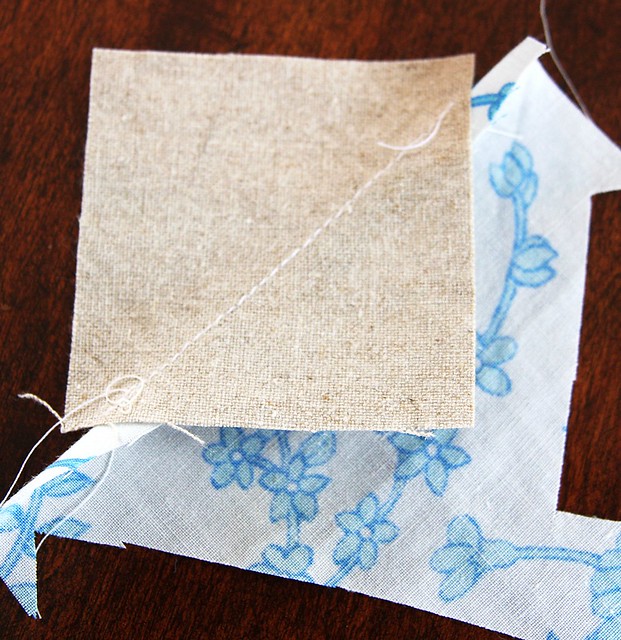
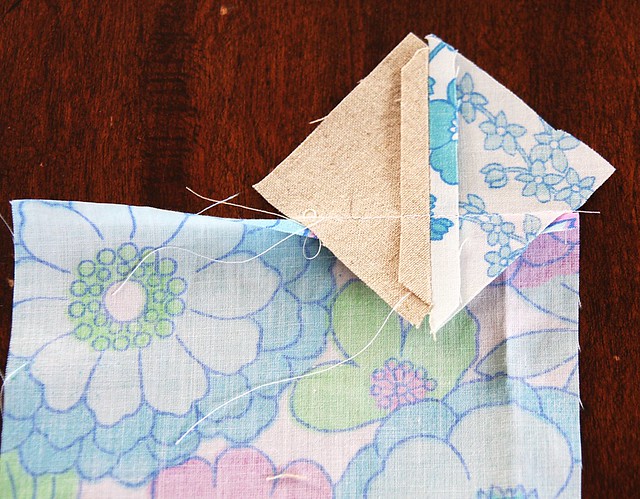
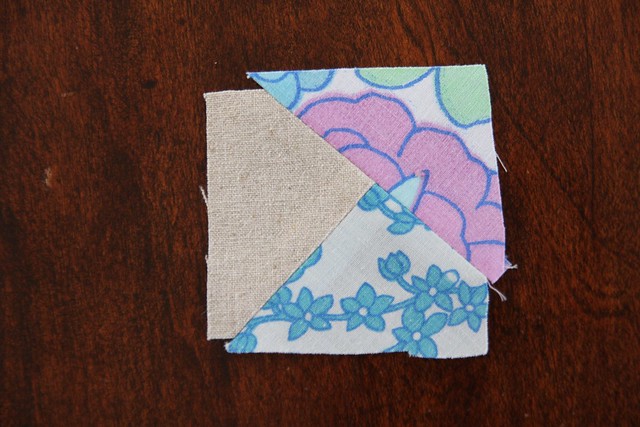
Once you have it where you want it, carefully flip it over and sew along the crease line. I usually just wiggle a couple finger tips under to grab the edge and keep it in place while flipping.

Untitled


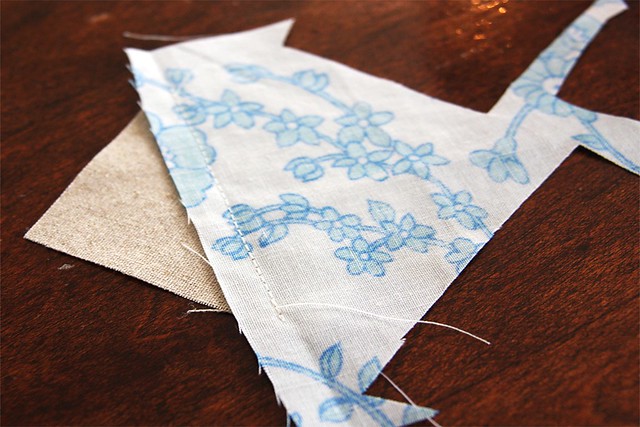
I then open the fabric out and flip it over so I can see the background square. If you can't see fabric all around the background square then you'll need to unpick the seam and try again.

IMG_0923


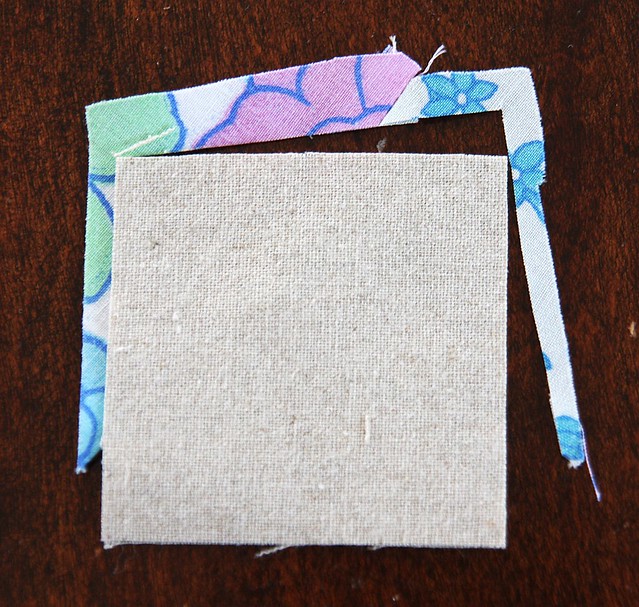
I trim around this to get rid of the excess, leaving a little extra just in case (I forgot and trimmed off the corner before I cut around it, don't be like me! I've Photoshopped it back together, if only we could do that in real life...). 

IMG_0925

Then trim off the excess background square. To be honest I don't really see the point in worrying whether this is 1/4" or not - who's going to see it? As long as it's wide enough things don't fray through and it's fairly even I call it good enough.

IMG_0926

I usually press open my seam with the iron at this point, although you certainly don't have to and can just finger press, I just think it means less distortion and the square will sit flatter in the end.

IMG_0927

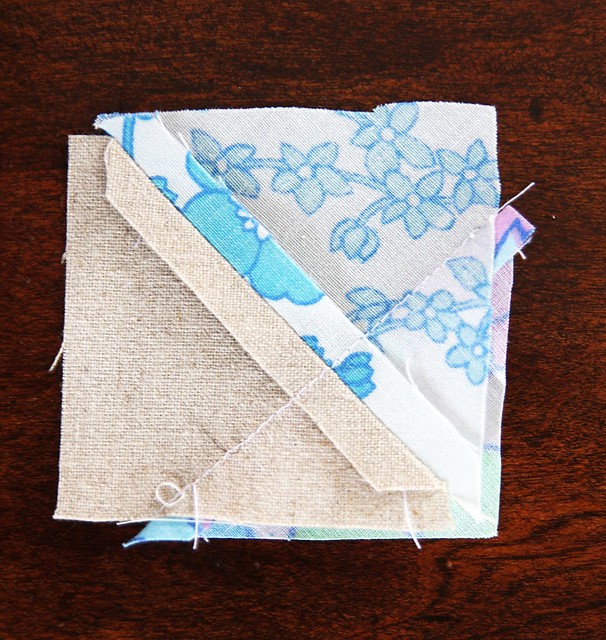
Now repeat with the second fabric. 
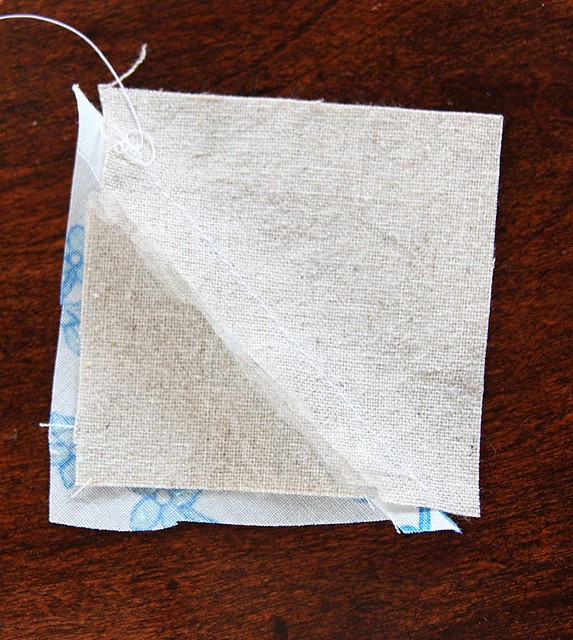
Position it on the square with the edge folded over

Untitled


Flip, and sew down the crease.

IMG_0929


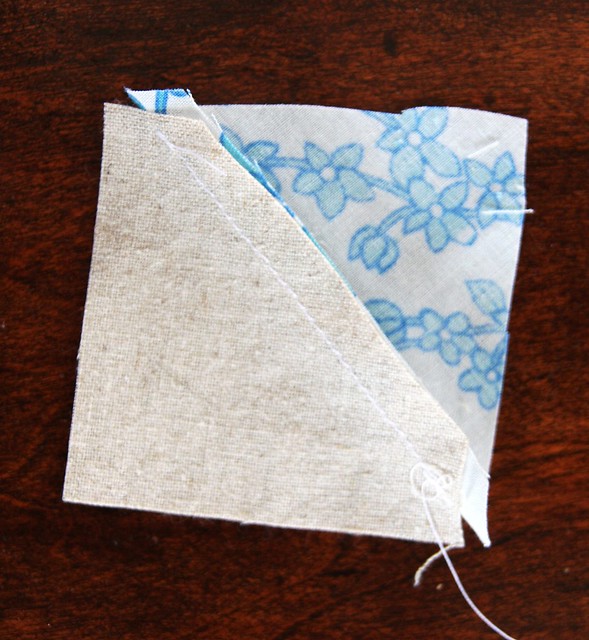
Open up the fabric and trim around the corner. Oh look, cat fur is stuck in the seam! Typical.

IMG_0930

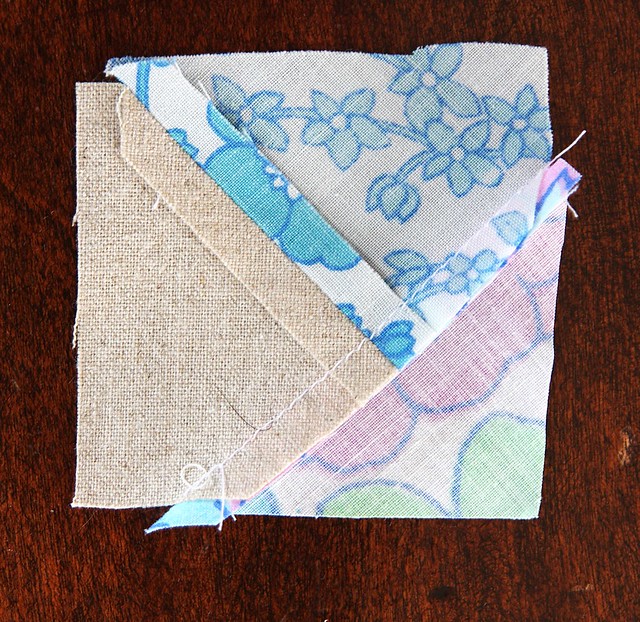
The corner will be a bit wonky from adding the first fabric but as long as you allow a smidge extra you won't get caught short when you open it out, which I know from experience is a seriously curse-worthy moment!

IMG_0931

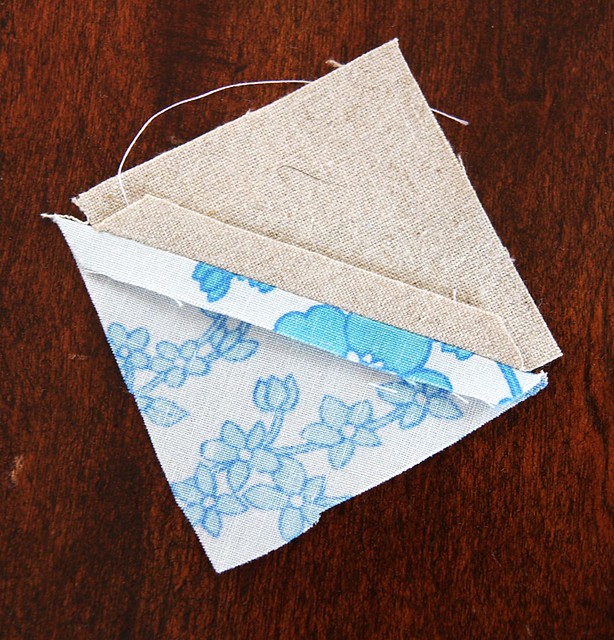
And then trim off the excess corner and press open the seam

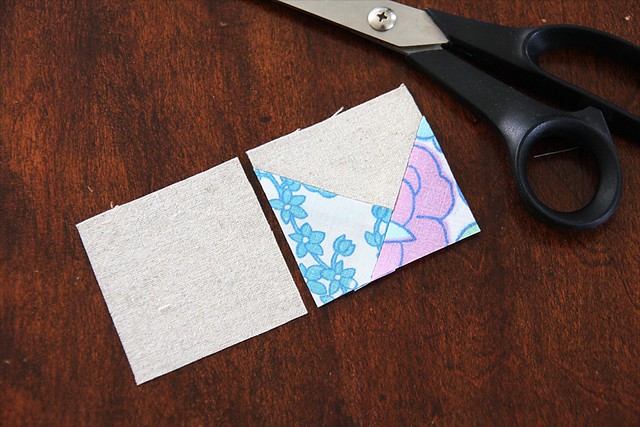
Now the square needs to be trimmed.

Untitled


Why pfaff around with a cutting mat when you have a perfect square of just the right size sitting next to you - just grab one of the unused background squares, position it over the top and trim around it carefully. I find this is a great way to square things up again if they've become a bit distorted by the sewing and pressing and much easier to do with another square than to try and figure out on a cutting board.

IMG_0934

 Et voila! A perfect little square all ready to go.

Untitled

17 September, 2012

Vintage sheet wonky stars

I made up this block as a sample to show the bee participants. I love it! I had this vision in my head of what the quilt would look like when I came up with the idea, and I think it might actually look even better in reality (which as you crafty people know isn't always the case!).

Untitled

I used a star block from the Modern Blocks book to get me started, but will do up some different ones to keep things from looking too samey-samey. I really did feel that I didn't have enough variety in the sheets when I was making this up, when of course I have heaps - maybe I need help?

ETA: You can see more of my blocks over at Jaffa Quilts and Milly Made It - it was such a thrill when Megan and Karyn's posts popped up in my reader over the weekend - I can see why people get addicted to bees! I love the variations they've come up with, and I need to get working on my own.

14 September, 2012

Lilla Handlebar Basket

Waaaay back in March I bought the Lilla Handlebar Basket pattern from Hemma design and ordered oilcloth and started out to make Hazel a basket. I got about 1/3 of the way in and it kind of fell by the wayside. There was a lot of gluing involved and I couldn't seem co-ordinate myself to do the gluing at times when I could let it dry and then get on to the sewing later. A couple weeks ago I had a fit of wanting to get some UFOs finished, and this was one of them (I still have too many to list here though).

One of the things that prodded me in to doing it was Hazel wanting to take stuffed animals with her on rides but not being able to since we've taken off the little doll's seat at the back of her bike. So for all your stuffed animal transport needs:

Untitled

If you look at the pattern photo, you'll see Hazel didn't want to mess with perfection in terms of which oilcloth we used, which was fine by me! I ordered mine from La Cuisine and it came super-fast. I've never used oilcloth before but it seems nice and it's not horrible and thick like I always think of oilcloth being. It sewed up really easily too, I was surprised that I had no issues with my foot sticking to it, and the needle went through easily. I had some tension issues, and the seams looked a bit untidy but other than on the flower at the front they aren't visible anyways so it didn't really matter. The pattern itself went together very nicely, even if there is a lot of gluing, but I had to do a bit of fiddling to make sure the lining pieces were the right size for the outer before committing myself with the glue! Parts of the lining were too small, and parts were a bit too big, and it's not like you can stretch or ease oilcloth to fit!


Untitled

She hasn't used it as a handbag yet, but I wouldn't recommend carrying heavy things in it, the handles are only held on with a narrow hem at the top. It's also a bit of a bitch to get on and off because the straps are very thick and don't bend easily.

11 September, 2012

The lows and highs of crochet

Fresh off the hook! Two more squares to go.

I've decided to make my first crochet project a cushion cover and not a big blanket so I can get on to trying out other things. My initial plan was to crochet the squares together using this tutorial, but I really didn't like the look of it when I was finished. The squares looked all wonky and the white toned the whole thing down and the lovely (some might say rather insane) brightness was totally gone. Crochet Fail.

granny squares finished

I'm pretty sure the wonkiness was something I'd done wrong (I think there's an extra treble in the intersections now that I look at it) and if I'd liked the effect of the white I would have gone back and tried to fix it - but I didn't so all the white was pulled out this morning and I've gone another way - more on that later!

Crochet came to the rescue yesterday though, when Hazel was given a birthday party invitation that had gone astray and the party was this afternoon after school! In the end she couldn't go because of prior commitments, but I thought a little present was in order anyways. I'd seen something a few days ago about crochet headbands with flowers and since I had several flowers hanging around after my experiments with putting them in squares I thought it would be an idea solution. Talk about a fast present! I googled for a pattern, came up with this great video, and half an hour later I had a headband. I stupidly didn't keep watching after I'd finished the band because she had this really neat way of attaching the flower, but mine was fine just stitched on. Hazel modelled it for me late in the afternoon. She was a bit put out about having to do it because she's not keen on headbands, but got into the spirit fairly quickly! And no, I don't know why she was in her pyjamas before dinner!

Hazel modelling a crochet headband made for a friend
Hazel

05 September, 2012

Wonky star bee blocks

For my Monday Modern group bee blocks I'm asking everyone to make me wonky stars using linen and vintage sheets. Everyone got a small bundle with an assortment of pink, blue, yellow and 'white' sheet scraps. The white are actually prints that have a lot of white background and soft colours, and I've included some solid white fabric just to make it more obvious.

Untitled

 I'm really very excited about this bee! I had to laugh at myself a bit though, while taking this bright and happy photo because look what it was doing just out of frame...


Untitled

 ...just bucketing down! In fact, by the time I took the top photo it was raining so hard that it was bouncing up off the deck (which is covered all the way to the steps out there btw) and getting on the fabric - if you look hard at the pink on the left you can see the raindrops.

04 September, 2012

Commenting issues

I've been using Disqus for my comments for awhile now, I was having such problems with the Blogger system not allowing people to comment, and because it wouldn't create conversations. It seems though, that there are just as many people who can't leave comments here with Disqus! I don't really know what to do. I would consider just removing Disqus and going back to Blogger just to see how it works, but then I'd lose all the formatting of the comments, and possibly lose some altogether.

The ideal situation would be finding out what issues people are having with the Disqus system so I can approach Disqus and try and solve the issues before getting rid of it. It would mean people who can't comment sending me an email with as many details as you can give - like an error message or what happens (or doesn't!) after you hit the send button. Would you do that? You can send them to the email under 'contact me' - just type that in rather than clicking on it because it's an image.

Thank you! I want to fix this so that you can all comment happily.

03 September, 2012

Granny squares and Irish roses

Untitled

I missed crochet the week before last so I decided I'd better have something to show for it last week. I've been very keen to try and put some flowers into the granny squares I've been doing but haven't found any really good tutorials that show me how to get the kind of flower I want into the kind of granny square I want (sort of like this one). In the absence of an actual pattern I found a couple of great tutorials for flowers on You Tube, and made an Irish Rose. I used the loops formed on the back that are meant for a third row of petals to put the outer two rows of granny square around. It's pretty much the same size as the other squares, so on a technical level it's fine, but somehow the rose isn't quite as full as I'd like, and it's a bit too big. I have a great book on flowers and other embellishments out from the library to play with, but if anyone knows of a tutorial that shows the proper way to add one in to a granny square I'd be really grateful!


Untitled

02 September, 2012

Naughty bag

I went to my Thursday crochet lesson last week with a bit of a heavy heart because Helen had just announced that she is closing her gorgeous wee shop at the end of next month. I feel awful for her, and also for me because she's been a happy part of my crafting for the last two years. I needn't have worried too much though, because crochet was lovely as usual and descended into some rather unladylike discussions on topics I won't repeat here for the sake of the others (and myself!). I haven't laughed that hard in awhile. The other nice thing was being introduced to the concept of the 'naughty bag' where you hide all your closing-down sale purchases. It was actually quite stressful deciding which of the fabrics I really needed to have some of, I tried to stay practical but damn it was hard! I could have taken a metre of most of the fabrics in the shop quite happily. In the end I brought this collection home

Untitled Helen said that's nothing compared to what some people were going out the door with, so if you're planning on going in I'd suggest doing it sooner rather than later! It's all up online too.

I have plans for almost all of it, but I know I'm going to have to be strict with myself on Monday when I'm there for the quilt group. I'm going to try some paper piecing with the Japanese Liberty-esque lawn, and there are a couple Xmas projects in there as well. Helen did a gorgeous linen table runner with that pink floral mixed in with some oranges that I'd like to try and replicate.

LinkWithin

Related Posts with Thumbnails