30 July, 2012

Blue, white and red

Or is it red, white and blue? Hazel's school had a mini-Olympics on Friday - her class chose Great Britain as the country they would represent, and they were meant to wear blue, white or red clothes. I realised on Tuesday that she didn't have anything in those colours at all. I've had an old red cardigan of mine waiting to be repurposed for her for ages, so I offered to make that and a skirt and amazingly she accepted! I went through all my Ottobre books, and some of Cat's that I had borrowed, to find a cardigan pattern I could use when cutting down my old one. I ended up using the Daytime Dreamer pattern from the Spring 2011 issue...

Daytime dreamer pattern from Ottobre Spring 2011

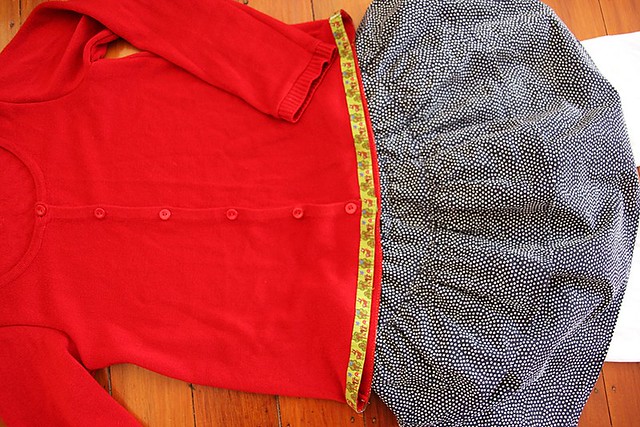
and then did the skirt and the leggings as well! For the skirt I used some old fabric I had started making a dress out of years ago for my cousin's wedding, only to discover part way through that it was shrinking when ironed and was much too small! It's pretty awful fabric really, very stiff with no drape at all, but it works ok in a layered skirt like this. Alright, it sort of works, it's really too stiff and the skirt sticks out oddly sometimes but she doesn't care! If I were to do it again I'd use a knit fabric.

Untitled

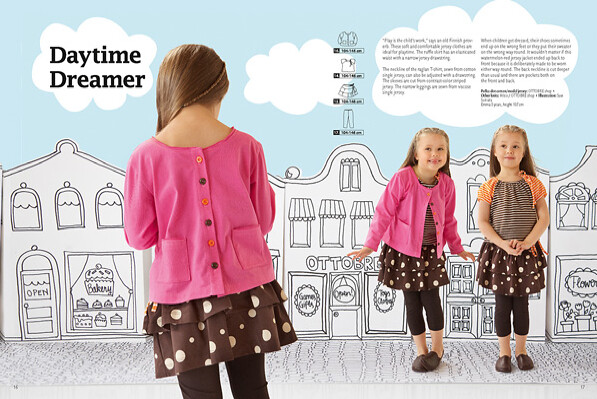
It looks cute on and she was really pleased with the whole outfit. When it came time to finish the bottom edge of the cardigan she asked if I had to hem it up because it might be too short, so I suggested putting ribbon around it instead. She chose this one from Stitchbird and personally kissed every single animal on it. The sleeves were a bit too short in the end, even though I'd cut them longer than the pattern, so I re-attached the cuffs to them and it actually looks really good instead of a make-do situation! The cardigan fits beautifully, much better than I'd anticipated given the sometimes rather odd Ottobre sizing. Hazel usually comes out at least two sizes smaller for chest/waist/hips than her height which is what the pattern sizes are based on. Anticipating that, I cut a 116cm pattern but 122cm in length. The 116cm should have been on the large size given the measurements, but it's just right and in terms of length 122cm is a bit short. I think I should have cut 122cm wide (her height) and 128cm long. So who knows where she's at with Ottobre sizing at the moment!

Untitled

I'm feeling a little bleary this morning, having stayed up until 1am the last two nights watching the Olympics. I don't know what it is with them and me - every time the summer ones roll around I'm all "ho-hum" (I do get excited about the winter it has to be said) because I'm really not interested in watching sports on tv. But every time I get sucked in and find myself watching sports like weight-lifting or dressage (pretty ponies!) and really enjoying it. At 1am. The time difference between London and here couldn't be much worse it has to be said!

24 July, 2012

Polaroid mini-quilt WIP

Our most recent homework for the Monday night quilt group was to make up polaroids for little quilts. We pooled them all and sorted them into groups of nine based on colour and then we all took a batch home to turn into a quilt. I scored with the reds. It's been a lot of fun putting it together, although I'm a bit stumped with how to do the quilting - suggestions welcomed!

Untitled

I changed the proportions of the polaroids so they have thinner tops and sides. I almost ruined them though, by trying to take a short cut and trim several down at the same time in a stack. Oh boy, SO not a good idea! The bumps caused by so many seams one on top of the other meant the rotary cutter wouldn't go through them properly, which caused several to skew and when I stopped to see how they were going it looked like some wild animal had been savaging them along the edges, and many of the borders were cut on an angle. Despair! Rending of hair and cursing of stupidity! Luckily, there was enough on all of them to create a straight edge with the blue sashing and I actually like the thin borders I ended up with. It wasn't very good for my blood pressure though.

I used blue strips of various widths for the sashing, ranging from 3-1.5cm. I'd say the 3cm gave the most flexibility in terms of placement and wonkiness, but having wide on one side and thinner on the other was also quite useful for breaking up the tendency for each polaroid to line up with the others. Thin-thin didn't work. I ended up laying them all out on the cutting mat, making sure the edges of each row extended over some arbitrary line, and then I cut along those lines. This meant all the blocks matched perfectly, although they're not all the same size. I think there are pros and cons to doing it this way. On the plus side all the blocks match up and sewing them together was a breeze. I also like that the seams are scattered about to a degree so it's not too grid-like. On the other hand, it is slightly random-looking and there are seams everywhere!

I used Kona for the solid blue and I have to say it's really not the nicest fabric. Sure there are bazillions of colours and all that, but the weave is so coarse and cheap-looking it's quite off-putting. I need to try some different manufacturers I think. Spotlight's solids have a very nice hand and come in a decent enough range of colours, but I've found if you iron them repeatedly across a point where the seam is quite thick the fabric wears quickly and the colour fades so I'm not sure what their lasting power is.

ETA: Thanks for all the comments about solids. If anyone is interested in the various types around Little Miss Shabby has a great run-down here.

23 July, 2012

Dandelions

Dandelions

I finally got the dandelion cross stitch done and I'm really pleased with it, it pairs up with the plantain very nicely! They're both Gerda Bengtsson patterns. If I had some more of that linen I'd do another one to make a trio, but unless a scrap turns up they will stay a pair. I need to get some more of the Danish Flower Thread though, the DMC equivalents don't have their lovely muted colours - this embroidery is a mix of two. I think I might ask for a proper Haandarbejdets Fremme kit for Christmas, perhaps this one.

One of the reasons I'm so pleased to have it done is that I've been mentally planning on putting up the photos above my desk* in the spare room after they all came down when the room was plastered and painted, and I wanted the two hoops up there. I tried to use those 3M adhesive strips to put up the frames but they wouldn't stick to the walls so I just banged in nails and it all went up pretty quickly. I'm planning on printing off a few more of my favourite Instagram photos and then trying to keep a bit current by swapping older ones out. Or I might just expand on to the other wall I don't know!

My desk

*And trust me, the desk is not normally this tidy - far from it!

20 July, 2012

I survived!

Term July holidays are over and I'm still alive with sanity intact - Mat was away for over two weeks with a short week at home with a couple of days away in the middle so I was doing it single-parent style. If Hazel were younger I think I would have snapped, but she's now at the age that all you have to do is add a friend and they're happily occupied for ages on their own. Not that I actually got much done during those times though! I keep thinking "when things go back to normal then I'll have more time to get things done" but I think this IS my new normal - routines gradually change as time goes on, even if you're a stay-at-home mum, and I need to just adapt my expectations to what is now and stop waiting for things to change.

One thing I have done though, is take on my first commission for Helen at the Little Craft Store. She couldn't do this last-minute baby shower quilt and asked if I would. I've never sewed for money before, despite many people telling me I should. My standard reply is that I'm too slow to make things that are affordable and I generally still hold to that, but this quilt was actually faster than I expected and I think it's because it wasn't mine - I didn't have to agonise over fabric choices, a nice simple pattern was given to me - not my problem at all! The brief was that this lady's mother had died this year and she wanted to include some of her clothes in the quilt. Helen weeded out the totally inappropriate and I was left with three light, synthetic-blend dress fabrics and some stabiliser and assorted quilting cottons! Needless to say it wasn't exactly smooth sailing but I got there. Luckily on such a busy quilt the mismatched corners don't show up too badly - despite the fusible interfacing on the back the dress fabrics were still pretty stretchy and made my life a bit hellish a couple of times!

Commission quilt

The thing that I found most interesting about this was the process of sewing something I actually don't like - I tried very hard to warm to it but it's so not my style that I just don't and never will. I could never spend the time on something of my own that I disliked that much, but oddly I find it's perfectly ok to do it when it's not yours! As long as the lady who commissioned it is happy then that's the main thing - and I also know other people think it's quite nice :) It's always such a shock to realise that perfectly sane and lovely people have completely different tastes to you, but hugely liberating because you don't have to dismiss them out of hand for it and can be friends. I reserve the right to shun you if you support the wrong political party though...

07 July, 2012

Negroni Shirt finished


Negroni Shirt, originally uploaded by Hazelnutgirl.

Wow, down to the wire! Mat's off to California for a conference in a few hours and I have only just hemmed the shirt and sewn on the buttons. So no photo of him IN the shirt until later, if he wants to be photographed that is!

Overall I'm fairly happy with it, but there are certain aspects I'm not thrilled with. The facings and collar aren't sitting nicely together and the outside of the yoke is slightly larger than the inside piece so it's slightly puffy-looking. The front facings don't sit nicely where they meet up with the yoke either. I'd need to make a few more to get an idea of whether that's me or the pattern or the fabric or a combination of all three! Probably the latter. It's amazing what pressing can do though!

Overall the style of the shirt is nice, although definitely slim-fitting. Mat's right on the upper range of the measurements for a medium - like he matched the numbers on the pattern exactly! Which is always a good sign in a pattern I think, because it indicates it's good for your proportions. There is an odd gap in the measurements though, with two inches in between all the size ranges, not sure what you're supposed to take from that. I did a tissue-fit that also suggested that the medium was good, particularly around the shoulders. However, the shirt turned out to be a bit slim through the body for him, which I fixed by letting out the side seams slightly (so no nice flat felling on them which is a pity!). The sleeves are also perhaps a skosh too short, but there's not much to be done there. If I make it again I'll cut a large on some pieces and a medium on others. I will also make a proper stand collar, this two-in-one version just doesn't thrill me.

The pattern itself is easy to follow, although the lack of clipping of curves is a puzzle. This isn't the only pattern that I've used recently that omits this rather essential step, nor the worst offender by far, and I can't understand how anyone can get a collar, or the curve on a facing around the neck, to sit nicely if the seam isn't clipped. What do you all think about that? Am I being needlessly pedantic over that step?

LinkWithin

Related Posts with Thumbnails